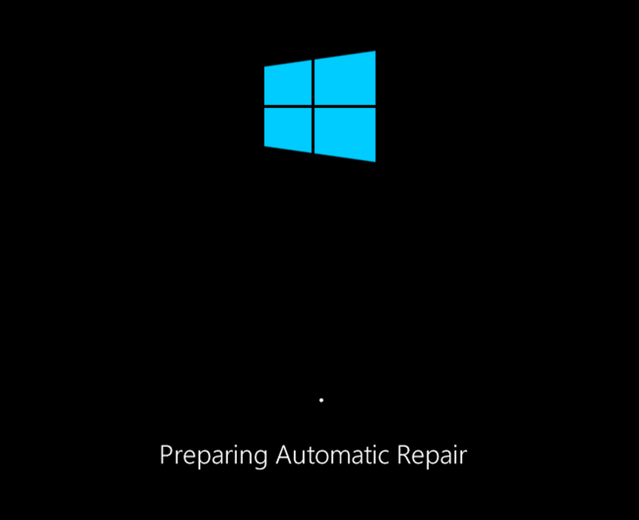
You’ll usually see this error when Windows 10 tries to boot and can’t, forcing itself through an endless cycle of automatically trying to repair itself. If Windows can’t repair itself, it reboots and repeats the cycle. To fix a Windows 10 automatic repair loop, here’s what you’ll need to do.
What Causes a Windows 10 Automatic Repair Loop?
There isn’t a single cause for a Windows 10 automatic repair loop, but there are several situations that are likely to cause it. Missing or corrupted system files are one of the more common causes, where Windows can’t boot (or repair itself) because these essential files it needs to run aren’t available. This prevents the Windows kernel (ntoskrnl.exe) and other essential Windows services from fully loading, preventing you from using your PC. Another issue that could cause a repair loop is a newly installed component or connected peripheral that’s missing a device driver (or just isn’t working correctly). If you’ve recently upgraded your PC, your new components will need device drivers to allow Windows to use it. If the drivers are missing, out-of-date, or not supported, it could cause a repair loop, especially for critical components like a new graphics card. Other problems, such as faulty components, malware infection, corrupted system registry, and even broken installation files all point to a possible cause. Thankfully, many of the fixes you can try below will work for most causes of a Windows 10 automatic repair loop.
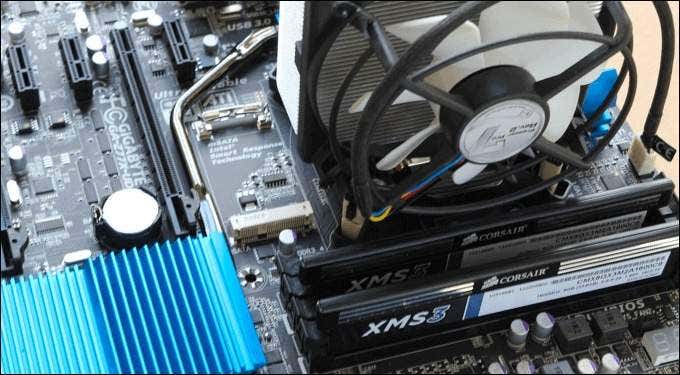
1. Disconnect or Remove Recently Installed or Connected Devices
If you recently installed new hardware before a Windows 10 automatic repair loop began to appear, then the hardware you’ve installed is a likely cause of the problem. This is usually because of a missing driver or driver conflict. Device drivers allow Windows to interface the hardware (such as your graphics card) with the software (Windows services and third-party software). If the drivers are missing or broken, this can stop Windows from booting up properly. In most cases, removing the problematic device will allow Windows to skip over the issue. If Windows boots with the device removed, you can then look at installing new drivers or replacing the component. For instance, installing a new graphics card could require you to download and install drivers from the manufacturer’s website.
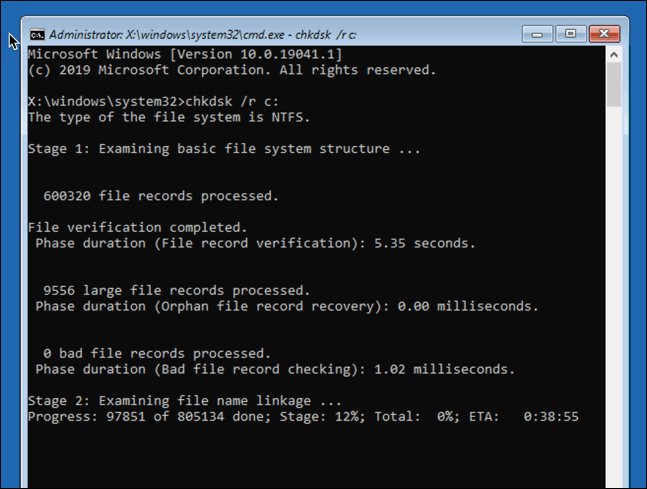
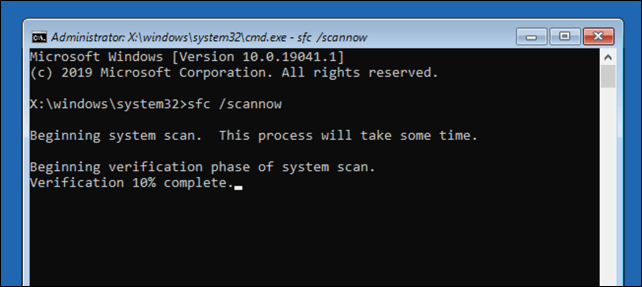
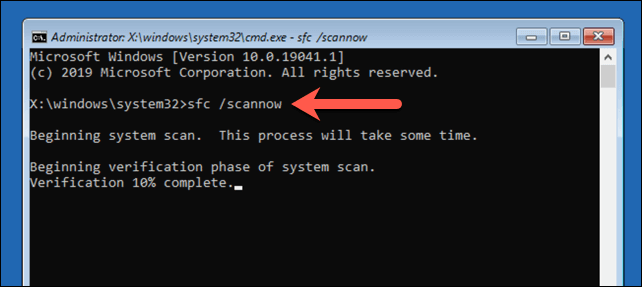
2. Run System Repair Tools (Chkdsk, SFC)
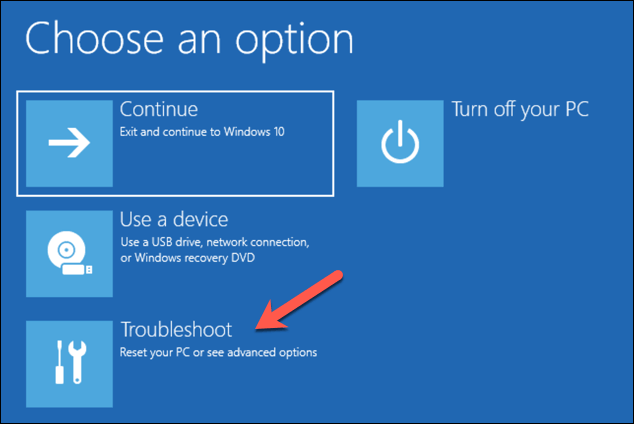
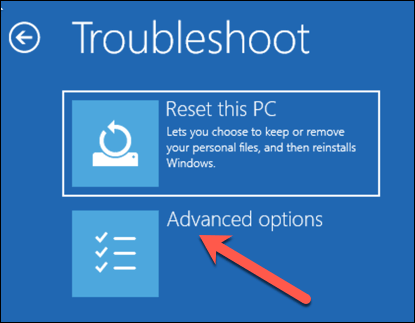
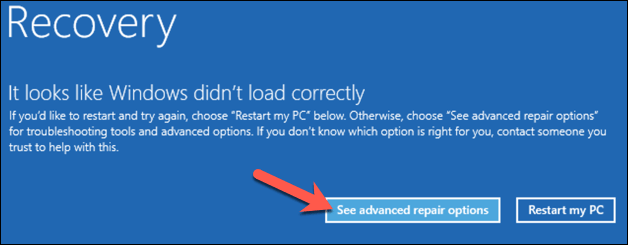
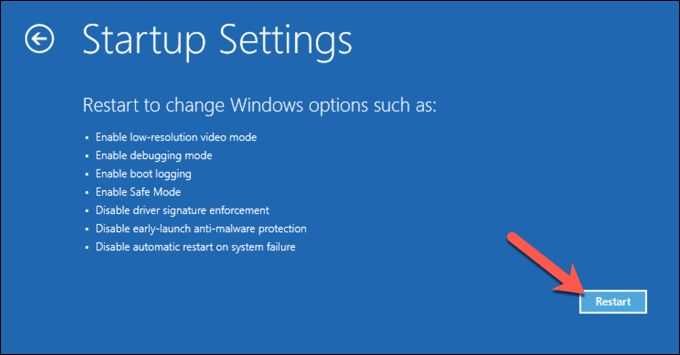
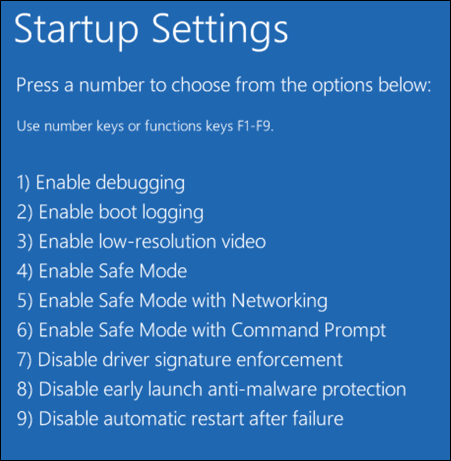
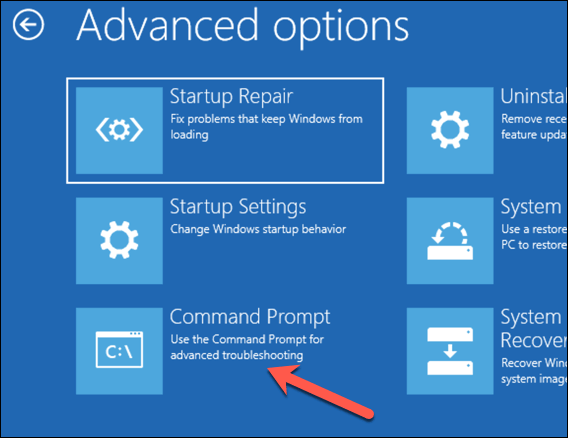
If you can’t immediately trace the cause of a Windows 10 automatic repair loop, the best thing to do is start with some common system repair tools. While Windows can’t boot, you can usually force Windows to boot to a command prompt window using the Advanced Options menu screen.
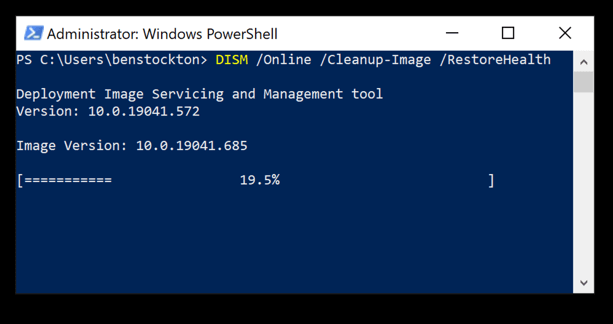
3. Run the Windows 10 DISM tool
The System File Checker utility above will fix system files using a local Windows image. If certain files become corrupted, Windows will replace them with the local image, but if this image itself has become corrupted, Windows can’t repair itself. To overcome this, you can use the DISM (Deployment Image Servicing and Management) tool to repair your system files first.
4. Disable Automatic Startup Repair to Limit Boot Loops
If you’re confident that a Windows 10 installation is still functional, then it’s possible to disable the automatic startup repair system. This should allow you to boot into Windows without the repair loop taking place. This will only work if Windows is working properly, however. If it isn’t (and you still can’t boot), you may need to consider more drastic fixes (such as restoring Windows) afterwards.
Maintaining a Healthy Windows 10 Installation
If Windows 10 is still in an automatic repair loop (or if it has other issues that prevent it from booting up properly), you may need to consider more drastic repair methods, such as wiping and reinstalling Windows. This may lose your local saved files, so be sure to back up your hard drive before you begin. Once you’ve managed to fix the repair loop using the steps above, you’ll need to make sure you maintain a healthy installation with regular system maintenance. Keeping Windows updated with new device driver updates and important system upgrades is essential. If updates become stuck or if updates just won’t install properly, don’t forget to try some simple fixes, from a quick restart to running the Windows Update Troubleshooter. Updating isn’t the only thing you can do to boost your PC performance, however—even cleaning your PC will have a positive impact.